Scrappy Hearts - craft time
A few years ago, the office I was working in planned a Valentine gift exchange. Similiar to the ones that most of us participated in while in elementary school. Only our exchange was not just little cards.
I found on the internet how to make scrappy heart ornaments.
I pulled from my fabric stash any fabric that had any shade of pink. Pink was either as the main background color, or in the design. Most designs included flowers.
I will let you know, I have a box of scraps. Large box of scraps. I did go through the scrap box first before I searched through my larger pieces of material. No since wasting a large piece if I have enough small pieces. Especially when I only need small pieces.
The site gave instructions using the item you can iron the pieces to make them stay where you placed them. I did not have any of that item, so when I made the scrappy hearts, I used fabric for my base and straight pins to hold the pieces in place. Lots of straight pins.
Recently, I have finished making a wedding quilt and decided I wanted to make the scrappy heart ornaments as the tie for the gift bag. While making the quilt, I saved all the small pieces. This allows the hearts to have the same fabrics as the quilt.
On paper, I drew and cut out a heart shape so I would know how much fabric I would need for the base. And, since I was making the hearts to be the end of the ties, I needed two hearts. I found a piece of fabric that was just under the size of the hearts. I trimmed the paper heart little by little till the size fit.
For this project, I place the fabric across my cutting mat. I place the paper heart on the fabric with the left edge of the heart at the 7-inch mark on the mat. I marked the edge of the right side of the heart with my finger, then moved the heart to the right of my finger. Doing this let me know that I needed to cover the area between the 7 and 15 on my cutting mat.

Once I had my scrap pieces placed on the fabric, I place a piece of tulle across the top and pinned it together.

At the sewing machine, I used a meandering stitch across the whole project. Just a note, the back side of this portion of the project will not be seen. If you are using fancy thread, or close to running out, as long as the tension on the machine is good, a different colored thread will suffice for the bobbin thread. Keep the tone the same level. I used a light blue when stitching this together. I avoided dark colors.

Once the stitching is done, I pinned the paper heart to the project and cut out the shape. I did the same for the second heart.

Once both hearts were cut out, I cut out two more hearts for the back of the project. For this project, I used the same material that was used for the back of the quilt. I also cut a length of yarn after testing to see how big of bow I wanted to make. I put two knots on each end. (I discovered this tip when making my first hearts. The crocheting thread I used was thin and did not catch during the sewing process. The thread slipped out. It made my hearts hanging by a single crocheting thread instead of a loop.)
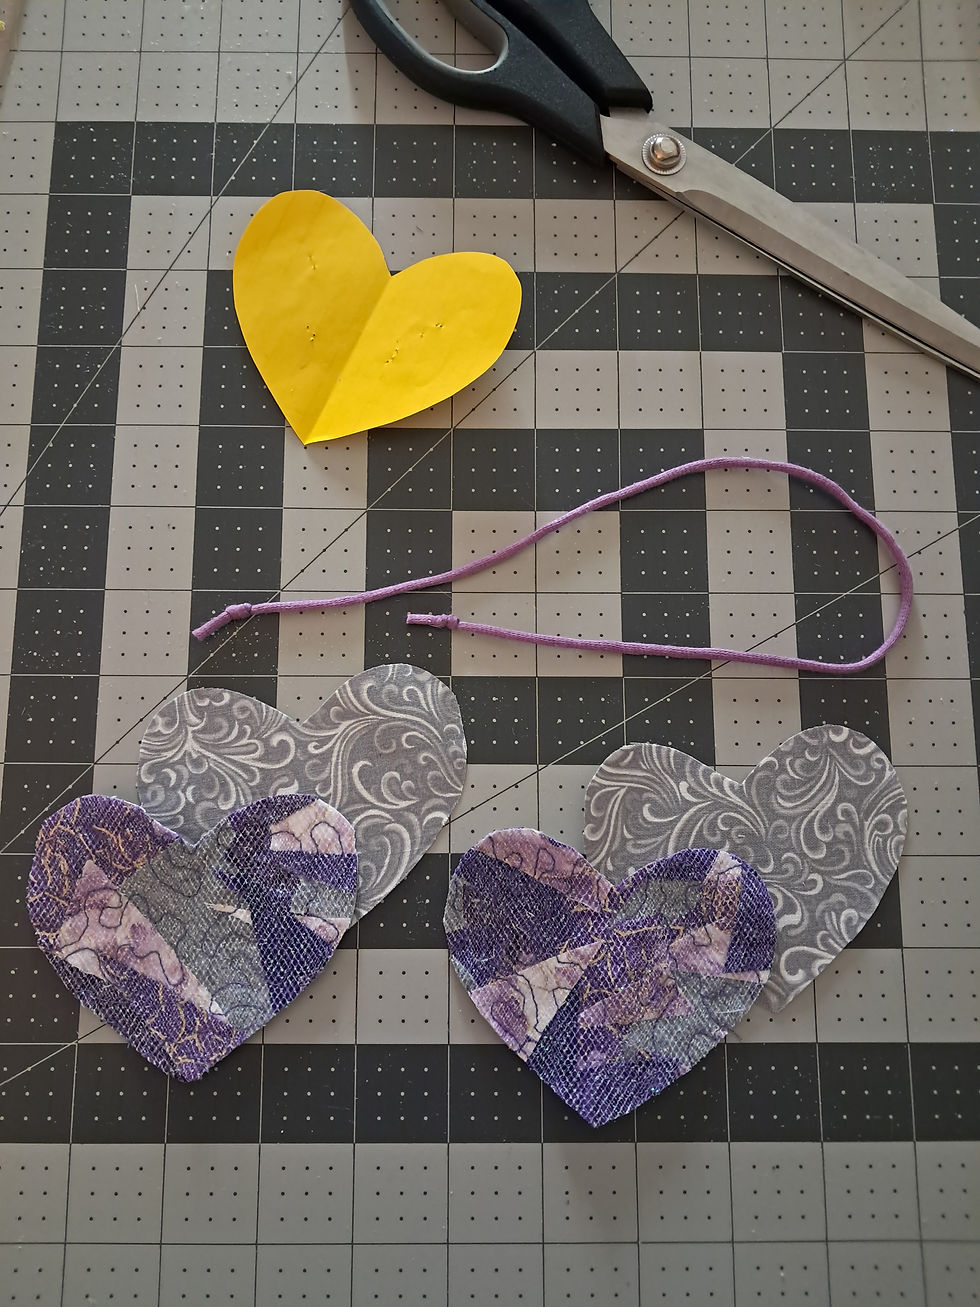
I placed the hearts together with the right sides on the outside. I will not be sewing this and then turning. Tuck the end of the yarn at the top center of the heart. The knots should be inside the heart away from the sewing line. Below is a picture how the hearts will look while sewing.

When sewing the hearts, start the seam just above the bottom tip of the heart. Because of the size of these hearts, I started about 1/2 inch up from the bottom tip. Sew a 1/8-1/4 inch seam around the heart. When at the top, to keep the stitches following the curves, take a couple of stitches. Raise the presser foot. Adjust the fabric. Lower the presser foot. Take a couple of stitches. Continue this process till pass the curve. This will help stitches to have a curved look and not a bunch of straight lines.
I stopped sewing the seam when I was about 1 1/2 inch away from the beginning. I left the needle in the down position to hold the heart in place.
Through the hole that is still open, I stuffed the heart. Again, I used what I had. I used the trimming of the batting from the quilt.

I did not stuff the heart to be overly full. Just enough to give it a puffy look and feel.
Once I liked the look of the heart's fullness, I continued to sew the seam to the starting point.
Once this process was completed for both hearts, I checked the edges. In places that any of the back fabric showed on the front, that area was trimmed. If you prefer, pinking shears can be used to trim around the heart. Just be careful to not cut the yarn while trimming the top.
The scrappy hearts are now complete and ready to hold the gift bag closed.


Comments